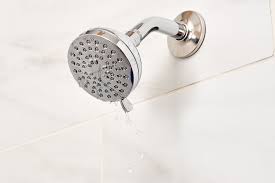
Not only is a leaky showerhead a massive water waster, but it can also annoy you with its steady drip. Repairing a leaking showerhead is a simple DIY project that won’t require the services (or money) of a plumber. But if you have any doubt or are unsure about doing it right, you can always acquire the services of plumbersingapore.org. The cartridge in the faucet that regulates the water flow could be the culprit, but the showerhead could also be at fault.
Why Is My Shower Head Leaking?
Since there are multiple possible reasons for a dripping showerhead, figuring out why your shower is leaking usually involves a process of elimination. It can be necessary to clean it periodically since dirt, filth, and limescale can obstruct water flow and cause leaks if left unchecked.
Another possible reason for a leaking showerhead is if the inner seals are worn or damaged. Your shower’s rubber washers keep water in by sealing the connection between the showerhead and the hose. As time passes, they degrade and water seeps out. Another possible reason for leaks in the shower is a worn flow cartridge in the valve. https://www.plumbersingapore.org/our-services/ are always here to help you out in critical situations no matter the time.
Step 1: Stop The Flow Of Water.
Cutting off the water flow to the faulty component is an essential first step in any plumbing repair, like correcting the shower head drip. The water shutoff valves are conveniently located under your sink. Turning off the water to the house is the safest option if you can’t find the valve to turn it off.
Step 2: Remove The Shower Head From The Pipe
To disconnect the shower head from the arm, you’ll need a wrench. To accomplish this, gently spin the wrench counter clockwise to loosen the nuts that secure the head. To avoid damaging the pipe threads and nuts, be careful not to be too forceful when doing this step. Therefore, use caution when turning a wrench.
Step 3: Check for Damage and Replace Defective Parts
Once you’ve laid out your showerhead components, check them for any damage. Take a close look at the valve body, o-rings, rubber washer, diverter valve, and so on. Replace any damaged parts with new ones after determining which ones are damaged.
Be aware that broken parts aren’t always to blame when it comes to leaking shower nozzles. It is important to keep an eye out for issues like mineral deposits inside your shower fixture, as these can also create leakages. In these kinds of situations, it’s best to seek the assistance of an expert.
Step 04: Cleanse the Showerhead
You might find a screen, rubber O-rings, and other components inside the showerhead. Check to see that they are unbroken and unobstructed by silt. Clean the inside of the showerhead if it’s dirty. After removing the showerhead from the hose, let it soak in vinegar for a minimum of half an hour. After rinsing it with water, use an old toothbrush to gently scrub away any built-up grime, limescale, or stubborn dirt, being careful to target each nozzle separately. After giving it one more rinse, put it aside.
Step 05: Wrap Pipe Threads
Use a little nylon scrub brush to remove any debris from the shower arm’s threads. Attach the threads using a single or double loop of thread-sealing tape, which is occasionally labelled as Teflon tape. Twist the tape in a clockwise motion.
Step 06: The Showerhead Must Be Reassembled
Reattach the showerhead to the shower arm and hand-tighten it. In order to observe the water stream’s performance, turn on the shower faucet for a while. You might want to think about getting a new showerhead instead of trying to repair the old one if the dripping problem persists just when the water is turned on.


