Creating your own backpack is a practical and rewarding project that combines creativity with functionality. A diy backpack gives you the freedom to design something that suits your exact needs, whether for travel, school, or daily use.
Many people who explore handmade designs often take inspiration from premium products like a leather diaper backpack, which reflects durability, smart storage, and thoughtful construction in real-world use.
What Is a DIY Backpack?
A DIY backpack is a self-made bag made from materials such as fabric, canvas, or leather. It involves planning, cutting, stitching, and assembling different parts to create a fully functional backpack. This process allows complete customization, from size and compartments to straps and closures.
Benefits of Making Your Own Backpack
There are several advantages to creating your own backpack:
- Full control over design and layout
- Ability to select durable materials
- Cost-effective compared to high-end products
- Personal satisfaction of building something unique
Materials You Need for a DIY Backpack
To start your project, gather these essential materials:
- Fabric like canvas, denim, or leather
- Strong thread and sewing tools
- Zippers, buckles, and fasteners
- Foam or padding for comfort
- Webbing or straps for support
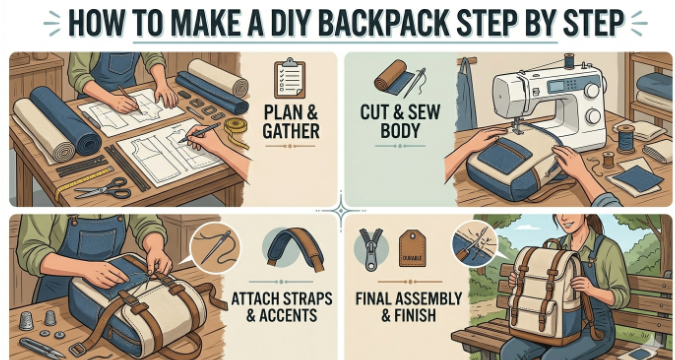
Step by Step Guide to Make a Backpack
1. Plan and Sketch Your Design
Decide on the purpose of your backpack. Whether it is for school, travel, or everyday use, outline the compartments and dimensions before starting.
2. Cut Your Materials
Measure carefully and cut each piece according to your design. Accuracy at this stage prevents issues later.
3. Sew the Main Body
Start by stitching the main panels and inner lining. Make sure the seams are strong and properly aligned.
4. Add Pockets and Zippers
Attach external and internal pockets along with zippers. These enhance usability and organization.
5. Attach Straps and Hardware
Secure the shoulder straps, buckles, and other hardware. Proper attachment is important for comfort and durability.
6. Final Finishing
Inspect your backpack for loose threads or weak areas. Reinforce stitching where needed to ensure long-lasting performance.
Common Mistakes to Avoid
When working on a diy backpack, beginners often make these mistakes:
- Using low-quality materials
- Weak or uneven stitching
- Incorrect sizing and proportions
- Ignoring comfort features like padding
Avoiding these issues will improve both the appearance and durability of your backpack.
DIY Backpack Design Ideas
Here are some ideas to inspire your project:
- Minimal everyday backpack
- Travel backpack with multiple compartments
- School backpack with a padded laptop section
- Leather backpack for a premium and rugged feel
Each design can be adjusted based on your personal needs and preferences.
DIY vs Professionally Made Backpacks
While making your own backpack is creative and fulfilling, professionally made backpacks often offer refined construction and advanced durability. They are designed with precision and tested for long term use.
This is why many users still consider quality leather backpacks when they want reliable performance, premium materials, and a polished finish without going through the entire DIY process.
Final Thoughts
Learning how to make a diy backpack is a valuable skill that blends creativity with practicality. It allows you to create a personalized bag that meets your exact requirements.
Whether you choose to build your own or explore ready made options, understanding the process helps you appreciate the craftsmanship behind every backpack. With the right materials and approach, you can achieve a balance of style, comfort, and functionality.